Audio/Video Input Question
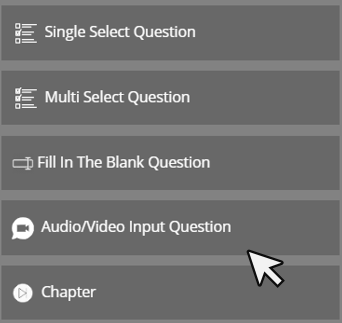
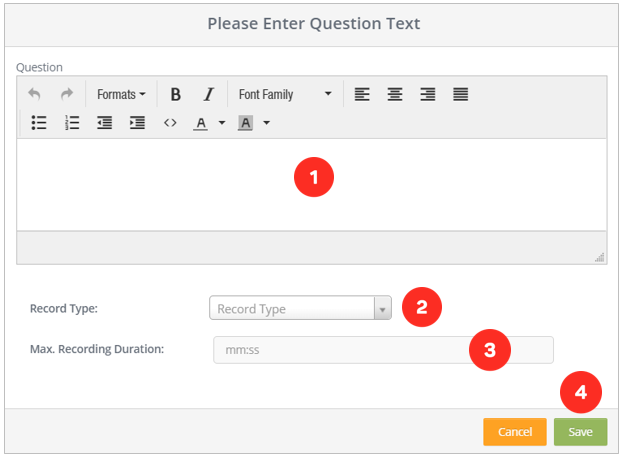
First, we drag and drop our element from the Elements list to the layer. The screen below will meet us.
1. The area where you will write the question.
2. The area you will select the type of recording you want to receive from the viewer. There are 3 options here. These; Audio + Video, Video Only and Audio Only.
With Audio + Video, you can record both audio and video from the viewer.
Video Only, you can only record video from the viewer.
Audio Only, you can only record audio from the viewer.
3. Time limitation of the record (mm: minute, ss:second).
4. After making all the settings, click the button to save your question.
Editing Audio/Video Input Question Element Settings
When we successfully add the Audio/Video Input Question element to the layer it will look like the following.
1. “Audio/Video Input Question" element attached to the layer.
Once I click on the element on my layer, the system will open the settings of the element clicked on the right side of the screen.
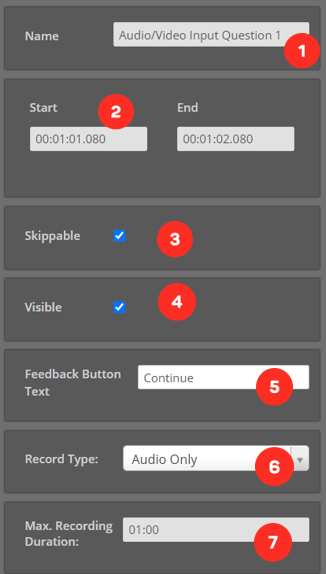
1. The area you will name the element you added.
2. Area showing when the element will enter the screen
3. The option you can choose whether the element you added is skippable by the viewers or not.
4. The option you can choose whether the element you added is visible by the viewers or not
5. Feedback text that will appear on the screen when you send the answer to the question.
6. The area you will select the type of recording you want to receive from the viewer. There are 3 options here. These; Audio + Video, Video Only and Audio Only.
With Audio + Video, you can record both audio and video from the viewer.
Video Only, you can only record video from the viewer.
Audio Only, you can only record audio from the viewer.
7. Time limitation of the record (mm: minute, ss:second).

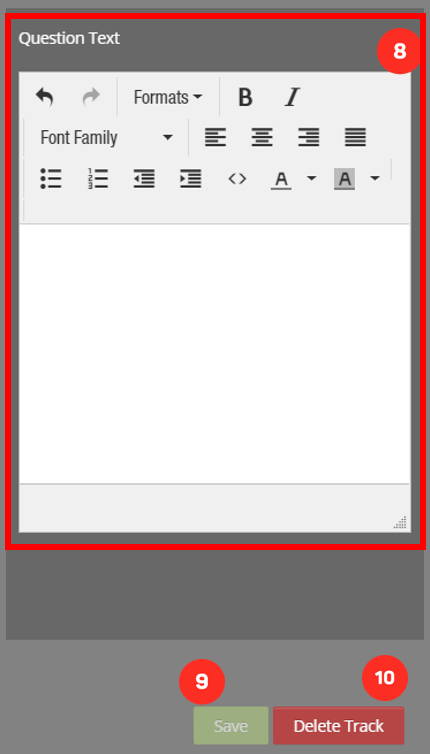
8. You can change the question you wrote and edit it.
9. Button, where you can save the properties you changed.
10. Button, where you can delete the element.
Related Articles
How to use Audio Element
With the Audio element, you can add sound effects and background music to complement your main video as an atmosphere. When we successfully add the Audio element to the layer it will look like the following. 1. Cinema8's sound library. It includes ...What is Video Element in Cinema8
With the Video element, you can add videos on your video in full screen. If you want, you can activate a button where you can allow them to pass the video you put when the time expires. First, we drag and drop our element from the Elements list to ...Introduction to Cinema8 Interactive Video Platform
Cinema8 is an interactive video development platform founded by Gobito Digital Solutions in 2017. Cinema8, which meets the video needs of enterprise or individuals with its features such as production, hosting, broadcasting, and reporting, continues ...Multi Select Question Element
With the Multi-Select Question element, you can add questions to any part of your video that viewers can mark multiple answers. First, we drag and drop our element from the Elements list to the layer. The screen below will meet us. 1. The area where ...Drag and Drop Question
You can add drag and drop questions to your videos with the Drag and Drop Question element. First, we drag and drop our element from the Elements list to the layer. The screen below will meet us. 1. The area you will name the question you will add. ...


