Conditional Action Element
Now let's explain with an example. First of all, add a question to your video.
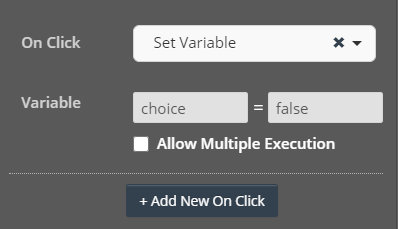
First of all, click on the "New York" button and add a new "On Click" action from the Properties on the right panel. After choosing the "Set Variable" option in the list, enter values to "key" and "value" sections. Here, the "key" part is the name of the variable that you will create, while "value" represents the value that you will assign to the variable that you wrote in the key part. First of all, since you’re working on the "New York" button, which is the wrong answer to the question, I put the value "false" in the "value" section.
Note: When "Allow Multiple Execution" feature is checked; the selected "Set Variable" feature is not disposable, it can work actively repeatedly. If this feature is not selected, your “Set Variable” action will only run once and you will not be able to write a new value on your variable.
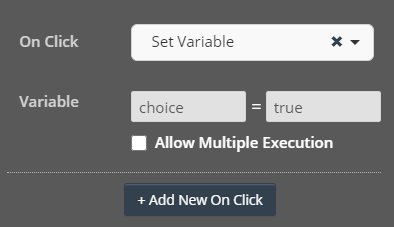
Also, apply the settings you made to the "New York" option to the "Washington" option. But, since the correct answer is this one, enter "true" in the "value" section.
Now the "choice" variable will be "false" when "New York" is selected and "true" when "Washington" is selected.
Now let's add "Conditional Action" element in any part of the video to look at how you can perform actions according to the answers by polling the value of our variable.
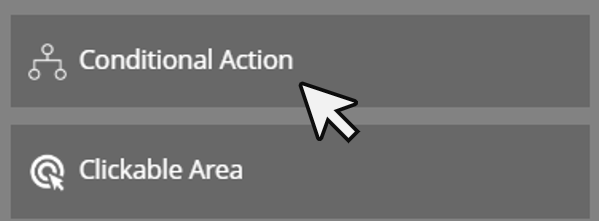
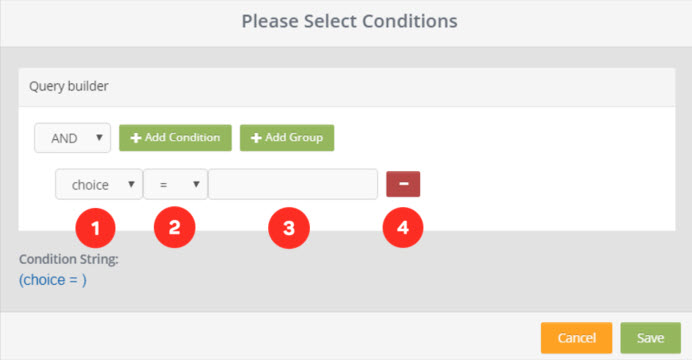
First of all, drag the "Conditional Action" tool from the Element list and drop it on a layer. A screen will open like the one below.
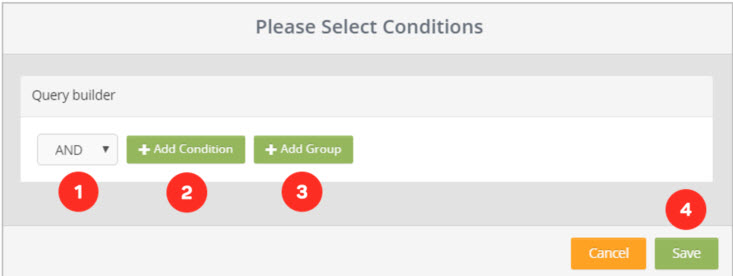
1. You can choose the query type here. There are 2 options that are "AND" and "OR". You can create a single query with the "AND" option, you can combine multiple queries with the "OR" option.
2. “Add Condition” button allows you to add a new query. With the query you will create here, you can perform the variables that you add to the tools with the "Set Variable" action.
3. It allows you to add a new query group. You can group the queries you add with this button.
4. This button allows you to save settings.
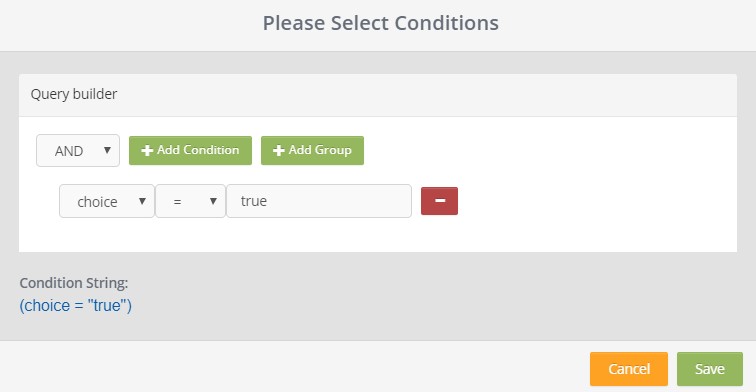
Now, click on the "Add Condition" button. It opens a settings area where you can create queries using the variables that you created in the video.
1. The variable list created in the video
2. A list with query options such as equal, greater than equal, less than equal
3. Here, you should enter the values that you created in the video. For example; if you write the value as “true” here, “Conditional Action” will perform its action by performing the query “if choice equals to true”.
4. The field that you can delete the query
After making the query settings, save it. Now, you should select the action when the query "if choice equals to true" occurs.
But first, using the "Image" tool, add the feedback image that will display when the viewer answers the question correctly, when the query occurs. The image below has been added to another layer in the same time interval as other elements.
("Congratulations" text added for feedback):
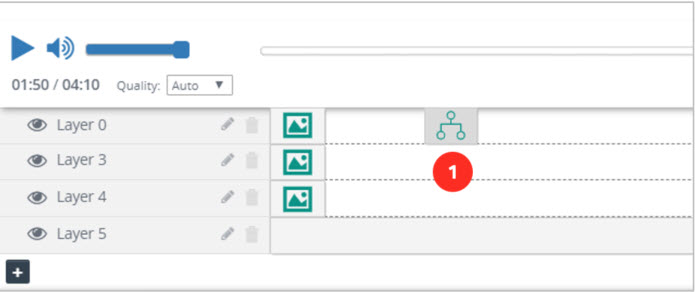
1. Click on the "Conditional Action" tool you added.
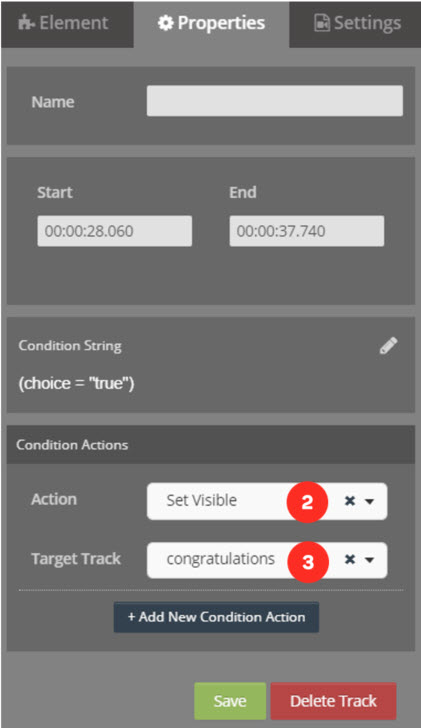
Now select the action that will perform if the query has occurred correctly from the Properties panel on the right.
2. This is the field that you need to select the action performing in the video if the query was done correctly (In the example screenshot, "Set Visible" feature is selected that you can make visible an object. Click to learn all functions of other actions in the list)
3. After choosing the action, this is the field that you need to select the element to take place the action.
After performing all these actions, the element is ready to use on video. If the viewer gives the correct answer to the question, the “choice” variable will be “true” and when the video reaches the time that the “Conditional Action” tool is added, the Congratulations text will appear.

Note: Conditional action works not only in the first second the tool was added, but also in the start-end time range. Verification of the condition in the time interval where you add the conditional action will make the tool run.
But if the viewer answers the question incorrectly, the variable "choice" will take the value "false". You can also trigger another action when the "choice" variable is "false" by adding a new "Conditional Action" tool.
Related Articles
How to Use Action Elements?
All interactive widgets in Cinema8 have action properties that are able to trigger some actions when they appear in the scene, disappear from the scene and they are clicked. This action list is also available in Elements panel separately named as ...What is Video Element in Cinema8
With the Video element, you can add videos on your video in full screen. If you want, you can activate a button where you can allow them to pass the video you put when the time expires. First, we drag and drop our element from the Elements list to ...Element Properties, Common Features
You can add unlimited interactive elements to your videos in Cinema8. There are many features that you can add to these elements and allow you to use them more effectively. Let's look at the common features of interactive elements. Name The area you ...Countdown Element
With the Countdown element, you can add countdown anywhere on your video and trigger actions at the end of the countdown you add. First, we drag and drop our element from the Elements list to the layer. The screen below will meet us. 1. Name the ...HTML Element
HTML is a system used in the preparation of websites. Browsers mirror the screen by processing HTML codes. So, what can we do in Cinema8 with the HTML element? With the HTML element, you can place all the elements that give embed code (such as ...
