Countdown Element
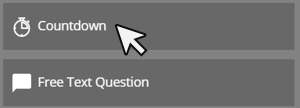
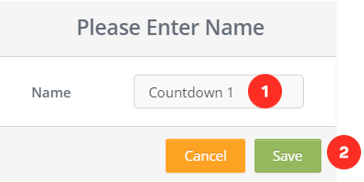
First, we drag and drop our element from the Elements list to the layer. The screen below will meet us.
1. Name the Countdown element you will create
2. After naming Countdown, save it
Editing Countdown Element Settings
When we successfully add the Countdown element to the layer it will look like the following.
1. “Countdown" element attached to the layer
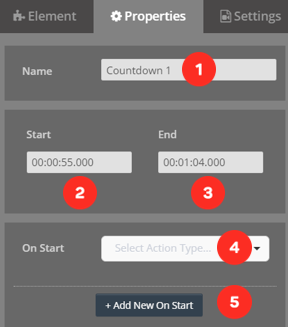
Once I click on the element on my layer, the system will open the settings of the element clicked on the right side of the screen.
1. The area you will name the element you added
2. Area showing when the element will enter the screen
3. Area showing when the element will exit the screen
4. Select the action you want to take on the video as soon as the element is on the screen.
 Click here to see all the actions’ explanations.
5. Add the new action you want to take on the video as soon as the element is on the screen.
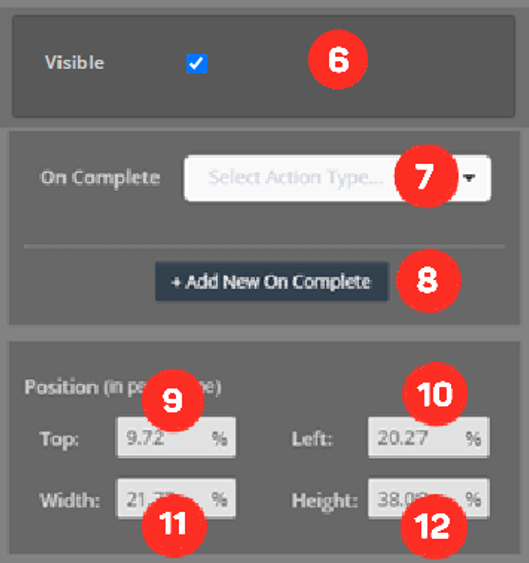
6. Mark if you want the countdown to be visible.
7. Select the action that will take place when the countdown ends. Click here to see all the actions’ explanations.
8. Add a new action you want to happen when the countdown is end
9. The distance of the element you added from the top of the screen
10. The distance of the element you added from the left of the screen
11. Width of the element you added.
12. Height of the element you added.
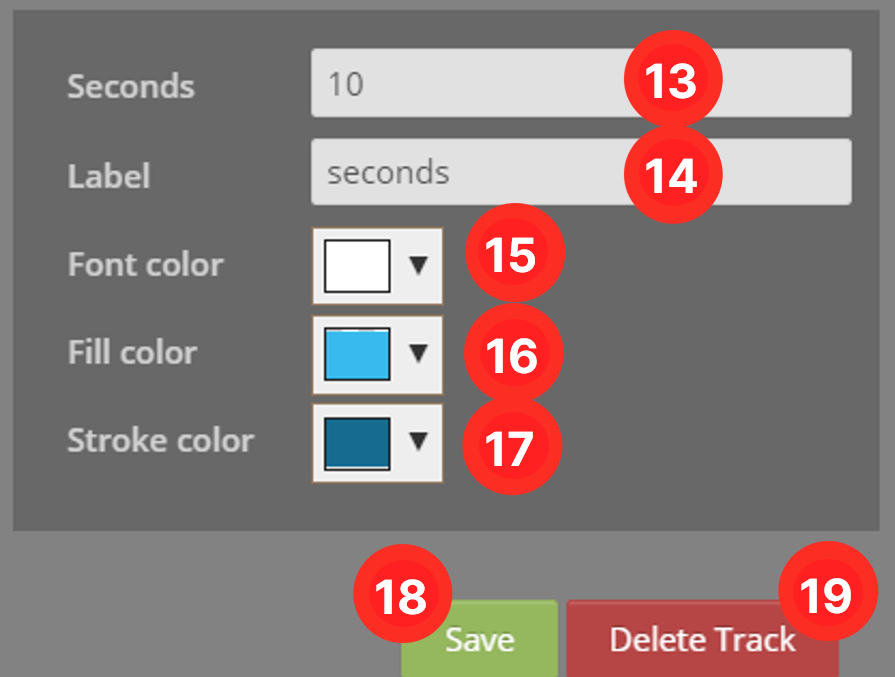
13. Countdown time.
14. Text to write in countdown element.
15. Countdown element font color.
16. Countdown element color.
17. Countdown element stroke color.
18. Button, where you can save the properties you changed.
19. Button, where you can delete the element.
Related Articles
What is Video Element in Cinema8
With the Video element, you can add videos on your video in full screen. If you want, you can activate a button where you can allow them to pass the video you put when the time expires. First, we drag and drop our element from the Elements list to ...Drawing Element
Drawing element allows you to draw on your video. There are 6 different types of drawing in the tool. There are also color options for the drawings you will make. First of all, we drag and drop our element from the Elements list to the layer. Here ...HTML Element
HTML is a system used in the preparation of websites. Browsers mirror the screen by processing HTML codes. So, what can we do in Cinema8 with the HTML element? With the HTML element, you can place all the elements that give embed code (such as ...Widget Element
Unleash the power of interactive video with the most extensive widget library on the market. Cinema8 creates the ultimate ecosystem for developing widgets for interactive videos. The Cinema8 library offers 1000+ widgets for interactive video, ...Project Item Element
With the Project Item element, you can add video routing cards on your video and direct your viewers to other videos with these cards. We drag and drop our vehicle from the Elements list to the layer. Here comes the list of projects we have created ...
