Introduction to the Video Editor - The Creative Studio
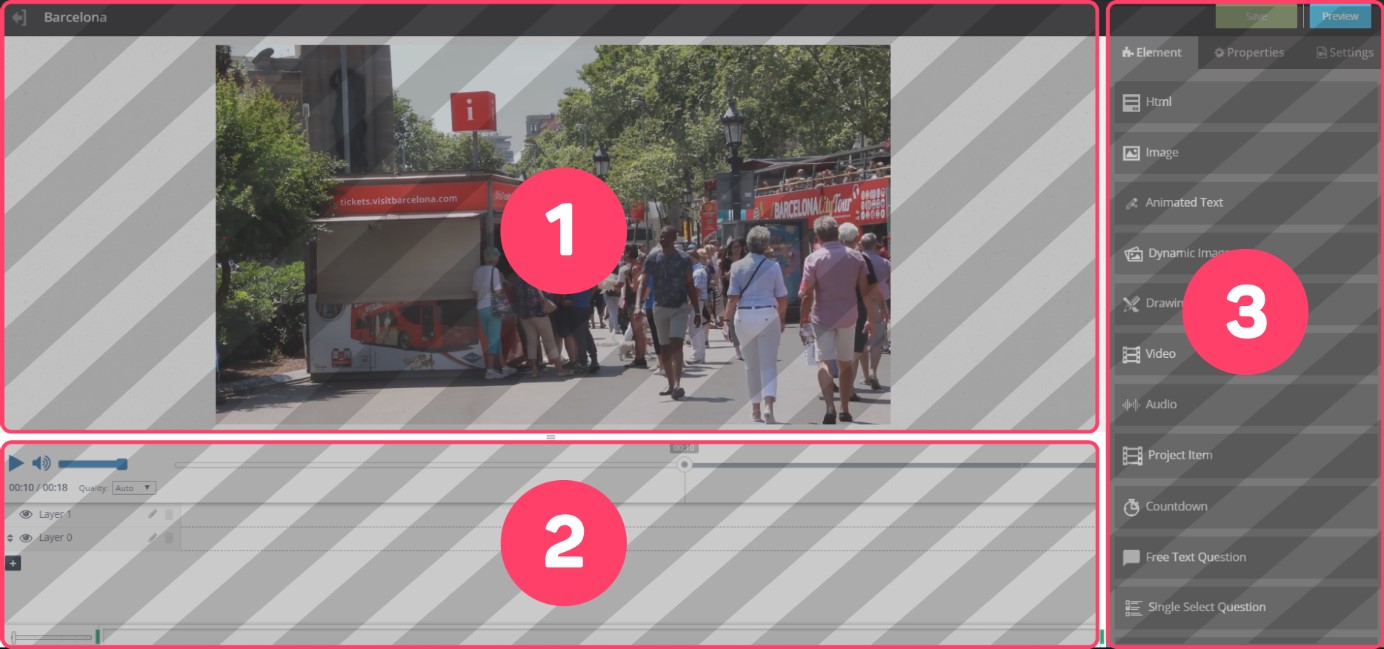
Cinema8 Video Editor provides users with the possibility of creating interactive video in a very simple way with its drag and drop methods and easy-to-use layer structure. Let's take a look at the general structure and design of Cinema8 Video Editor that makes it easy to use.
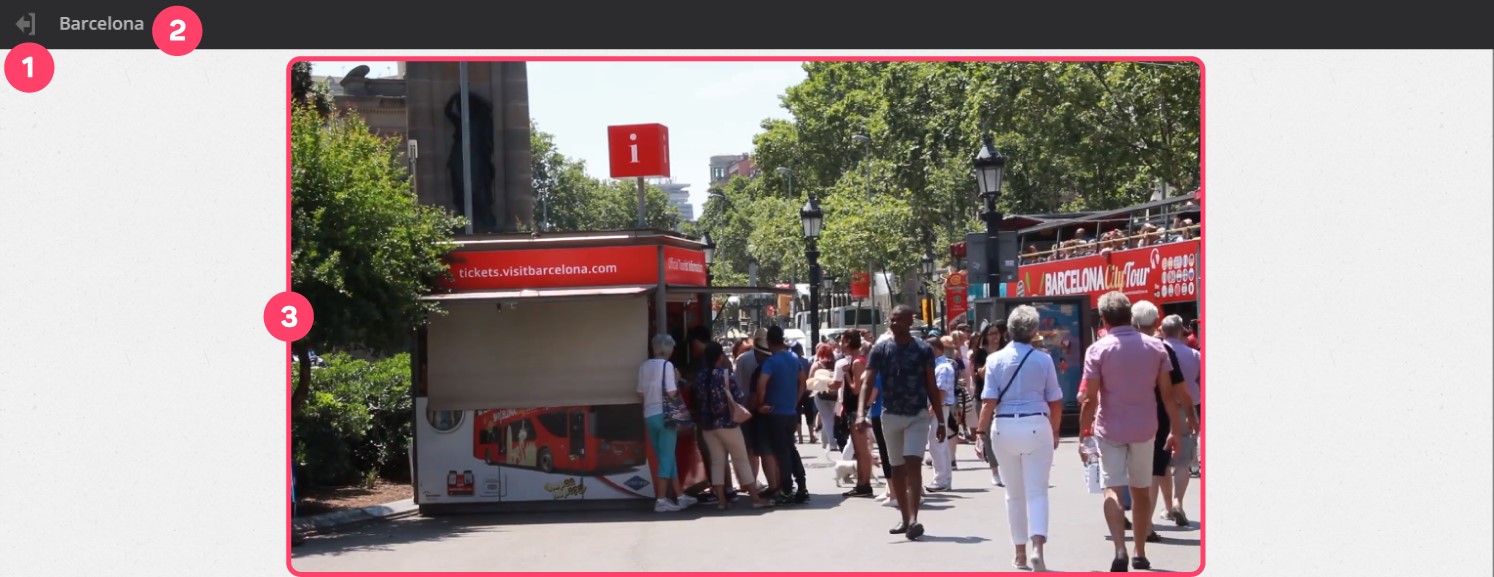
1- Video Workplace
1. Return to the Cinema8 Projects Menu.
2. Project name
3. Project video preview.
2- Layer Field
1. Play/pause your video and edit the volume. Changes you made here do not permanently affect the video.
2. Allows you to change the video quality while working in the studio. Changes you made here do not permanently affect the video. This feature is often used when working on a huge project, to prevent high-quality video loading and loss of time.
3. Move it up or down, so you can adjust the height of the corresponding panel.
4. Indicates the seconds of the video you are working in the editor.
5. Click the button to add a new layer.
6. Allows you to move the layer up and down. This feature is often used to move an object in a layer over an object in another layer.
7. Makes the objects on the relevant layer invisible in the editor screen.
8. You can change the name of the related layer.
9. You can delete the relevant layer.
10. You can add interactive tools.
11. Area where you can zoom in or out on the timeline of the video.
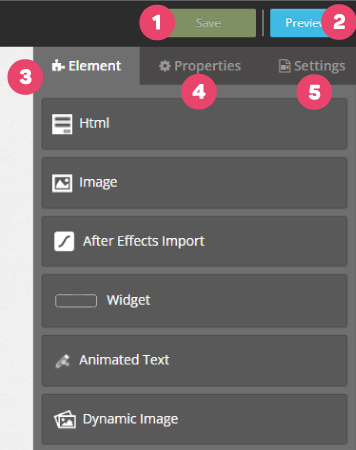
3- Interactive Elements Panel
1. Button to save the changes you made on the project
2. Button that allows you to preview the final version of your project in a URL.
3. List of interactive elements.
4. Properties panel when you click on an interactive element that you added on the timeline, where you can make settings about the element.
5. In the Settings tab, you can back up your video, edit its player bar as you wish, or turn on other features such as your video being shareable. Click for more information.
Related Articles
Creative Studio
Cinema8 Creative Studio is an online video editor that allows you to make editings and add interactions on your videos. With magical touches in its world, you can turn each of your videos into interactive experiences. Video Content Editing Even for ...Introduction to Cinema8 Interactive Video Platform
Cinema8 is an interactive video development platform founded by Gobito Digital Solutions in 2017. Cinema8, which meets the video needs of enterprise or individuals with its features such as production, hosting, broadcasting, and reporting, continues ...What is Video Element in Cinema8
With the Video element, you can add videos on your video in full screen. If you want, you can activate a button where you can allow them to pass the video you put when the time expires. First, we drag and drop our element from the Elements list to ...Login to Cinema8 Creative Studio
Before you start to create interactive videos in Cinema8 Creative Studio, you need to login to the system. You don’t need any extra software to install. Basically, you can use your browser to login. Now let's see how to. 1. Write www.cinema8.com to ...Customizing Cinema8 Video Player
It is an important component for branding to reflect the corporate identity on every platform used. Existing native players may not reflect your corporate appearance. However, thanks to the customizable player offered by Cinema8, you can engrave your ...


