Server Side WebHooks
A webhook (also called a web callback or HTTP push API) is a way for an app to provide other applications with real-time information. A webhook delivers data to other applications as it happens, meaning you get data immediately. Cinema8 Webhooks are a method you can use to inject your own business processes into your interactive videos.
Creating Webhook
Let's look at how you can adding webhook.
First, return to the main menu and click on the "Tools" button.
Then click the "Webhooks" button on the page that opens.
Click the "Add Webhook" button.
Let's take a look at the settings of the webhook we will add.
1- The field where you will enter the name of Webhook
2- The field where you will enter the link where you will post the data
While posting your data with Webhook, you may want to create special headers as an additional security measure. While a person who can access the webhook link used may have access to your data, you can avoid this by using the header feature.
3- The field you will enter the name of the header you will create
4- The field where you can enter values in the header you create.
With this feature, you can compare the header value you created while controlling the header value you created in your system, but you can access the data if the values match.
This feature is also used as a security measure. It is intended that people who do not have access to the header and header value data you have created cannot access your webhook data.
5- Button where you can create a new header
6- When this feature is turned on; As soon as Webhook in your video is running, the video will be stopped until the webhook link being run returns the response. The purpose of this feature is to prevent problems such as internet problems while sending data via webhook or late response of the webhook link.
Adding Webhook to Video
Following the webhook narration steps, I create a new test webhook.

{ "discountCode": "C8-COUPON-XYZ", "imageUrl": "http://i.pinimg.com/originals/51/f6/fb/51f6fb256629fc755b8870c801092942.png"}
I am creating a new project to add the webhook I created. Click to see how you can create a new project.
Since there are two data in my test link that I can import into my video (“discountCode” and “imageUrl”), I add two HTML tools. I will embed the data in the link into these HTML elements.
Note: When you want to bring data into the video via webhook in Cinema8, you can also get the values inside the objects. Because Cinema8 webhook supports the "nested object" model. Click to see how you can extract data from the object via Webhook.
We will be using a HTML element to visualize webhook response data within interactive video.
1- "Source Code" field where I can place code blocks in my HTML tool.
I click on my Source Code button in my HTML tool and insert and save the "DiscountCode: $ {discountCode! -}" code.
We will also add “imageUrl” data, which is already in webhook response data. I'm coming to the Source Code section. I place and save the code "<img src =" $ {imageUrl} "/>" in the source code.
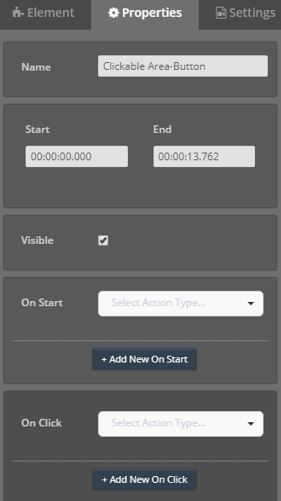
Finally, I add one clickable area to invoke the Webhook I created. When this clickable area is clicked, I will give "On Click" feature for Webhook to work.
I open the settings by clicking on the Cliackable Area I added.

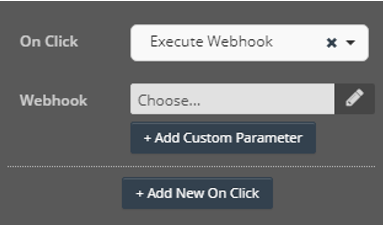
I will add my Webhook here. I click on the On Click field and select the "Execute Webhook" option.

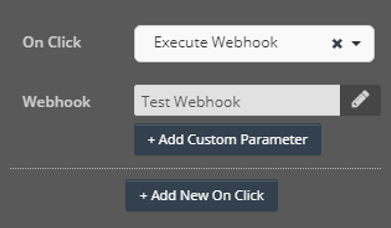
Then, by clicking on the "Choose" button, I select the "Test Webhook" that I created first.
Note: If an action other than the Webhook is selected in the onClick, onStart, onEnd, or onComplete events, the other selected action will not work unless the webhook successfully performs the data return. When successful data flow is achieved through the webhook, then the other onClick action selected will also work.

Now when I click on the clickable area, my Webhook will run and data will be sent to the HTML tools I added.
Related Articles
Getting started with C8 API
Cinema8 APIs to build extensive digital experiences within your videos. Cinema8 has an extensive API to support your business and your customers’ needs while developing interactive video-based solutions. Whether you are developing a web application, ...Studio Development - Using Variables
Cinema8 creative studio allows you to develop video interactions without writing code with drag-and-drop tools, You can still create variables in the video, fill these variables from integrations or widgets you have developed, and build algorithms ...Javascript WebHooks - Custom CallBacks
You can add javascript web hooks in to your interactive videos with Cinema8.By this technic you can inject custom javascript codes in to your videos and empower your interactive videos with your business process. You can use "Execute Custom Callback" ...Working with video URL parameters
You can customize interactive videos with parameters you pass to Cinema8 video urls. Check out this video to see a running example of how you can configure a video with url parameters. https://cinema8.com/video/ADQrr9X6?sub=en&t=s10&autoplay=1 This ...
